|
Anyone following this series should by now have a small UWP up and running with the ability to add, remove and view data from a Firebase database. In this post I'm going to add the ability to update existing data in the database.
Small UI Changes Updating data is very similar to adding and deleting data, since the object data must be supplied and the object key so that the correct object is updated within the database. However, some UI changes must be made first since I have used TextBlock instead of TextBox for the Name and Rating fields in the HeroItem class. As a result, the data in these TextBlocks cannot be changed. In addition to this, these elements cannot be accessed from the event handlers in this class, so I will also set class variables for these elements. Here are the changed portions of HeroItem.cs: public class HeroItem : StackPanel { Hero hero; MainPage mainPage;
TextBox tbName; TextBox tbRating;
public HeroItem(Hero hero, MainPage mainPage) { // code omitted //
// add the name tbName = new TextBox(); tbName.Width = 100; tbName.Text = this.hero.Name;
// add the rating tbRating= new TextBox(); tbRating.Width = 25; tbRating.Text = this.hero.Rating.ToString();
// code omitted // } With the changes made to the Name and Rating elements, I'll now move over to HeroConn.cs and add the Update() method. HeroConn.cs Update() The code I have used for updating is almost a carbon copy of the code I have used for deleting. I first created the Update method in HeroConn.cs like so, passing in a Hero object: public async void Update(Hero hero) { await firebase.Child(node).Child(hero.Key).PutAsync<Hero>(hero); }
The only real difference to the Delete method, aside from the naming of course, is that the hero object must be passed in to the PutAsync<Hero>() method at the end.
HeroItem Update Button Event Handler
First, I added an event handler to the button 'btnUpdate' in HeroItem.cs and let Visual Studio create the handler for me. The code in the HeroItem constructor: // add the Update button Button btnUpdate = new Button(); btnUpdate.Content = "Update"; btnUpdate.Tapped += BtnUpdate_Tapped; And the new event handler: private void BtnUpdate_Tapped(object sender, Windows.UI.Xaml.Input.TappedRoutedEventArgs e) { HeroConn conn = new HeroConn(); this.hero.Name = this.tbName.Text; this.hero.Rating = Convert.ToInt32(this.tbRating.Text);
Task.Run(() => conn.Update(this.hero)).Wait(); this.mainPage.GetHeroes(); } This method is a little different to the Delete event handler. In this one, I took the current values from the related TextBoxes and assigned them to the relevant properties of the Hero class variable, hero. This object with the new values is then passed to the HeroConn Update() method and finally the UI is updated as before. Now test and run the application again, try to edit the data for a hero in the list and then click the Update button beside that hero. Note: I noticed at this point that the tbName field was too narrow for some of the names I was storing and displaying, so I changed its width in the HeroItem constructor to 150. As I have stated repeatedly in these posts, I am not focusing on creating a nice UI but only on implementing the basic CRUD functionality. As always, if you have the Firebase Console page open, you should see the record turn yellow and the new data added, like in the image below: 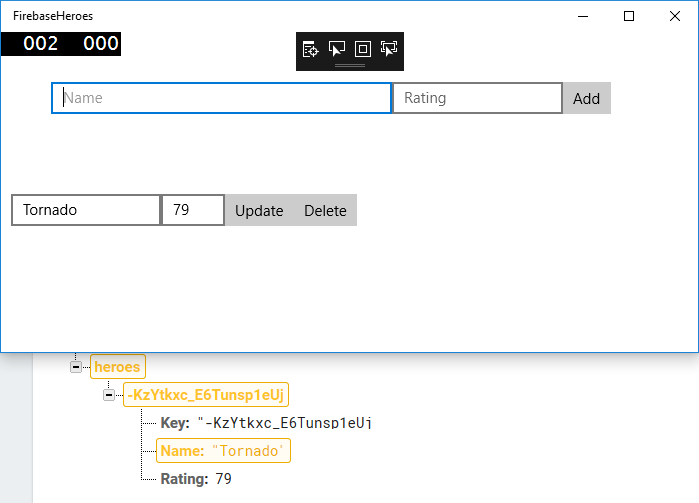
That's it for this post and for the bones of this application, basic and all as it is. I haven't yet decided what to do in the following post but it should be up in the next number of days.
0 Comments
Leave a Reply. |
Author
2nd Year B.Sc. Software Development Archives
December 2017
Categories |
 RSS Feed
