|
In this post, I am going to implement deleting data from the Firebase database. This will be a relatively short post since it's so simple!
In a nutshell, there are two options for creating the HeroConn Delete() method. I could:
The Delete() method First, I'll create the Delete() method in HeroConn.cs: public async Task Delete(Hero hero) { await firebase.Child(node).Child(hero.Key).DeleteAsync(); }
This is so very straightfoward but I'll talk about it very briefly. Using the same node as always ('heroes/'), then get the child of that node using the Key value - this is the unique identifier of the object in the database as I have mentioned before. On the child, perform the DeleteAsync() method and voila.
Note: To use this correctly, i.e. Child().Child() , you must have the following using statement at the top of HeroConn.cs: using Firebase.Database.Query;
This can be quite confusing if you receive errors and has caught me out in the past.
With the method created, it's time to implement it in the UI. Because the Delete button is part of the HeroItem class and I want to update the UI after the event, I am going to need a reference to the Main Page to call the GetHeroes() method. I am going to do this the simplest way possible - by passing a reference to the Main Page into the HeroItem constructor...
Changing the HeroItem constructor Passing a reference to the constructor is not enough, I also need to set a class variable to be able to access this reference from the event handler, like so: public class HeroItem : StackPanel { Hero hero; MainPage mainPage;
public HeroItem(Hero hero, MainPage mainPage) { this.hero = hero; this.mainPage = mainPage; // code omitted } }
Notice that I have omitted the rest of the code for the HeroItem class to save on space.
Now, anywhere I have created a HeroItem object, I need to ensure that the reference is passed in. Luckily, this is only one line of code in the foreach loop in the GetHeroes() method in MainPage.xaml.cs: foreach (Hero h in heroList) { this.spHeroList.Children.Add(new HeroItem(h, this)); }
Simple, pass the reference to the Main Page object (this) in to HeroItem constructor. Note: the GetHeroes() method signature should also be changed to public so it accessible from the HeroItems.
Delete Button Event Handler An event handler needs to be created for the Delete button and Visual Studio makes this very easy. After the btnDelete.Content line in the HeroItem class, simply type btnDelete.Tapped+= and then press the Tab key. Visual Studio will create and assign the handler to the button. The code for the button in the HeroItem constructor now looks like this: // add the Delete button Button btnDelete = new Button(); btnDelete.Content = "Delete"; btnDelete.Tapped += BtnDelete_Tapped; Inside the event handler, create a new connection, call the connection's Delete method and then update the UI once the object is deleted by calling mainPage.GetHeroes(). The final method should look like this: private void BtnDelete_Tapped(object sender, Windows.UI.Xaml.Input.TappedRoutedEventArgs e) { HeroConn conn = new HeroConn(); Task.Run(() => conn.Delete(this.hero)).Wait(); this.mainPage.GetHeroes(); } Now, run and test that the application is running. Of course, you should have some Heroes in the database - if not, add some first. Clicking the Delete button beside any Hero in the list should now remove that Hero from the database and consequently, the list. If you have the Firebase console open, you should see the record first turn red and then disappear from the database, like in the image below: 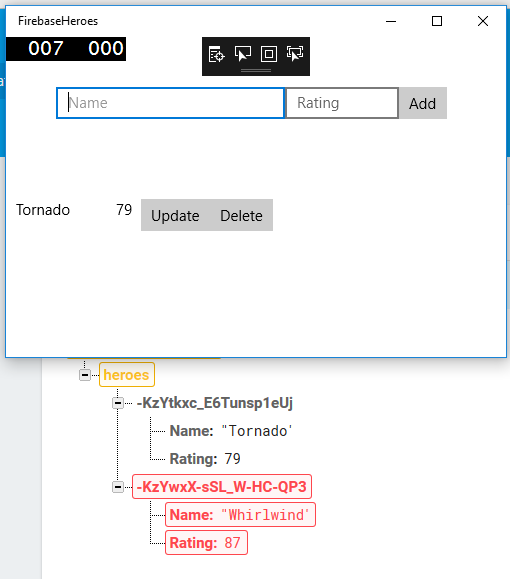
Once again, it's not very pretty but it works! In the next post, I'll look at updating the database data.
0 Comments
Leave a Reply. |
Author
2nd Year B.Sc. Software Development Archives
December 2017
Categories |
 RSS Feed
